Posted on

Round Peg, Square Hole

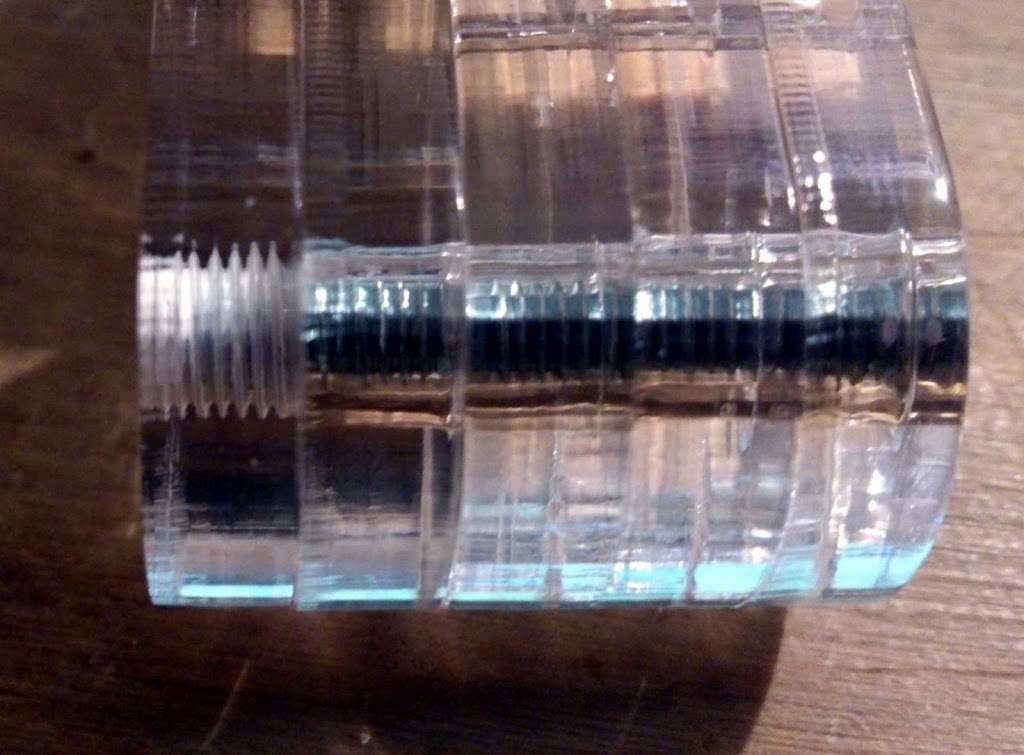
Today I had to purchase a cheap tap and die (this one) set to repair a heat press. It worked perfectly well on steel so I thought I would try acrylic.


After tapping a few holes for no reason whatsoever I thought I would try threading a slot as a replacement for a capture nut. 


As it turns out it is practically impossible to do and keep the tap anywhere near central!

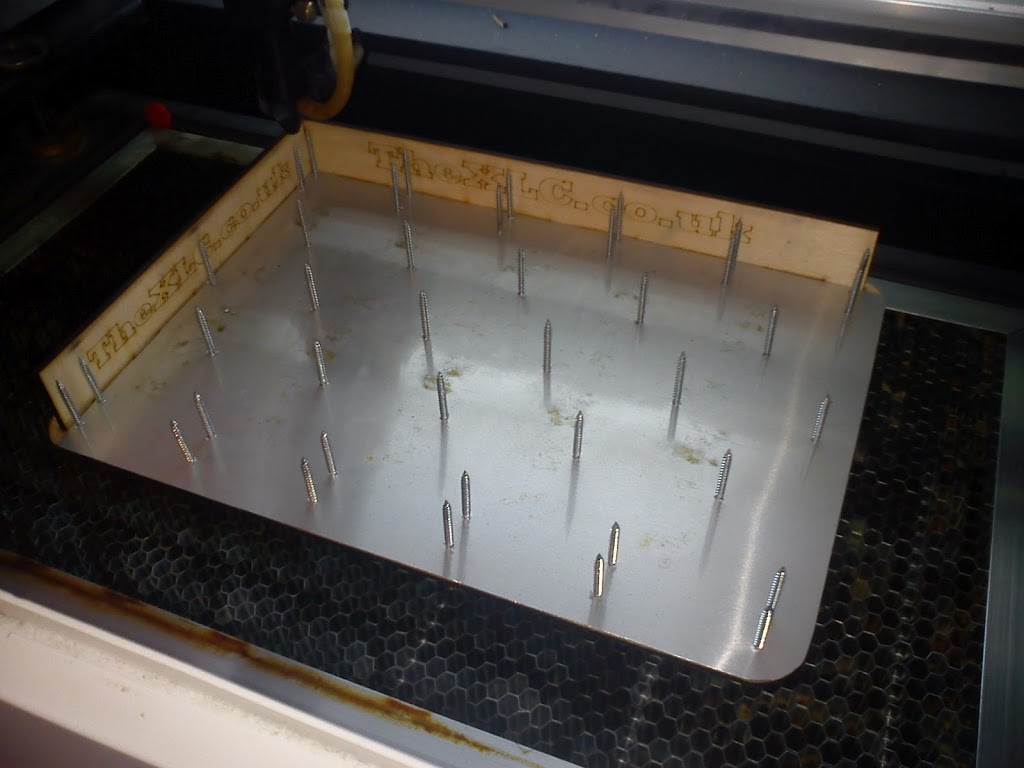
20 minutes later I knocked up a jig (with tapped holes of course) to hold everything in alignment. You can download the plans here.


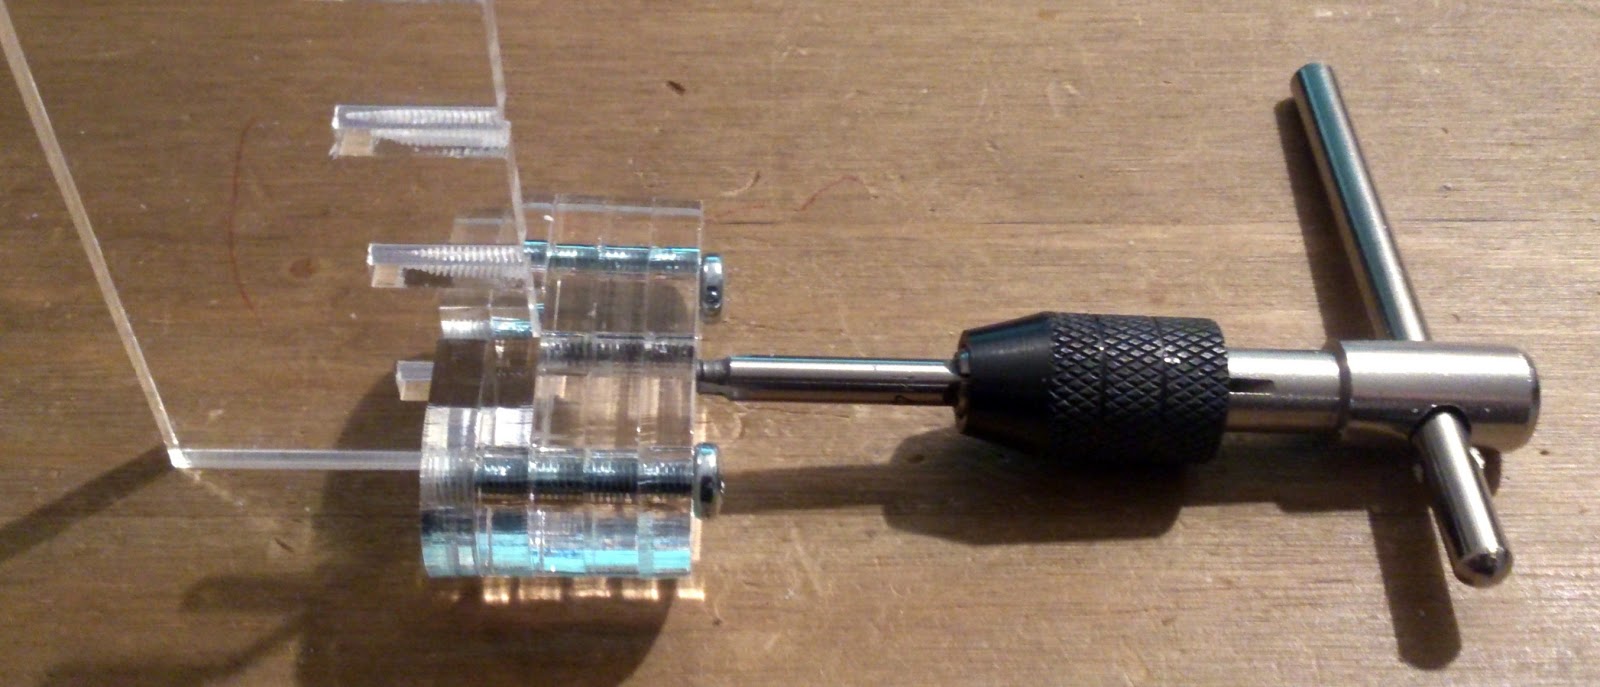
Its similar to a doweling jog but a lot less complicated. Surprisingly it works like a charm! The tap cuts easily (although if you go too deep and reach the end of the slot the whole thing binds up completely and will not undo) and the final joint is surprisingly strong. Probably not as strong as the captured nut but it does the job.


Specs if anyone wants to try this:
Acrylic – Cast 5mm Clear (Perspex) 
Tap – M4 x 0.7
Hole for thread – 3mm
(3.2 is quoted for M4 but with laser kerf 3mm seems better)
Slot – 3mm


Posted on

USB Microscope

We were lucky enough to be given a USB microscope this christmas so decided to try it out by soldering some Atmega8A in a TQFP32 package that we got REALLY cheap from China. We etched a breakout board using the vinyl on paper – laser print – heat transfer technique (we will write a post up about that later) and prepared to solder.

We realised they were small but hadn’t realised HOW small!


More after the break


Luckily we could get far closer than we will ever need to solder.


 The microscope can also record video – below is our first attempt at soldering this size package. So far everything seems to have been successful!


Not the most thrilling video in the world but it works!


Posted on

Ebay Listing

We have finally got round to starting to add some products to ebay, all laser cut of course. Ebay shop. So far we have quite a few home decor items which are great but the most interesting item is a Breadboard Component Holder.

More after the break


After getting fed up of bent pins on our breadboard compatible components (being of the “stick it in the box/drawer” school of tidy) we decided to come up with something that we could use to store these items. We now have a few of these on walls and desks and in one case on the side of a PC!

With a couple of male headers we can use them to store dev boards like the Stellaris Launchpad, Chipkit and of course Arduino!


We even use them to store ICs like this L293D Motor Driver


Only problem we have is that it takes quite a while to laser drill the six thousand two hundred and nine holes!


You can get one here – Breadboard Component Holder

Posted on

Laser Pin Table

Being attached to a print facility we cut a lot of paper and board and are always looking for ways to improve the cuts, reduce ashing etc. We have tried honeycomb, frames backings etc and decided to try a DIY pin table. 


The table consists of 4mm ply, laser cut, with a thin aluminium face and screws acting as the pins. We are really pleased with the results and the cuts we are getting are excellent. The next version will have vent holes added.  (FYI – the paper size here is SRA4 which is a printers oversize paper size of 320x225mm)


The height of the side panels is defined purely by what size screws we had to hand. If you build one yourself be careful as the screws are pretty dangerous when arranged like this.


These cards are for Jules Thomas at The Last Hurdle and have some really intricate work which cuts really well on this table.


The files can be downloaded from Thingiverse (thing 23940).

Posted on

Fire Detector

After Martins fire, and have a near miss myself I am planning to build a fire detection system for my laser. I am already building an Axolotl temperature sensor system (which I am logging at the moment) so when that is complete I will have a look at using a similar system for fire detection. Whilst the temp sensor is being finished I am going to log the temperature in the laser to see what sort of range I am dealing with. For this I am going to use the chipkit / arduino prototype for the Axolotl system and write something simple to monitor the com port on the PC.

I will strip the LED and buzzer off and hook up the temp sensor directly.

More details and code will be published when I have it hooked up.