Posted on

Gecko Lid

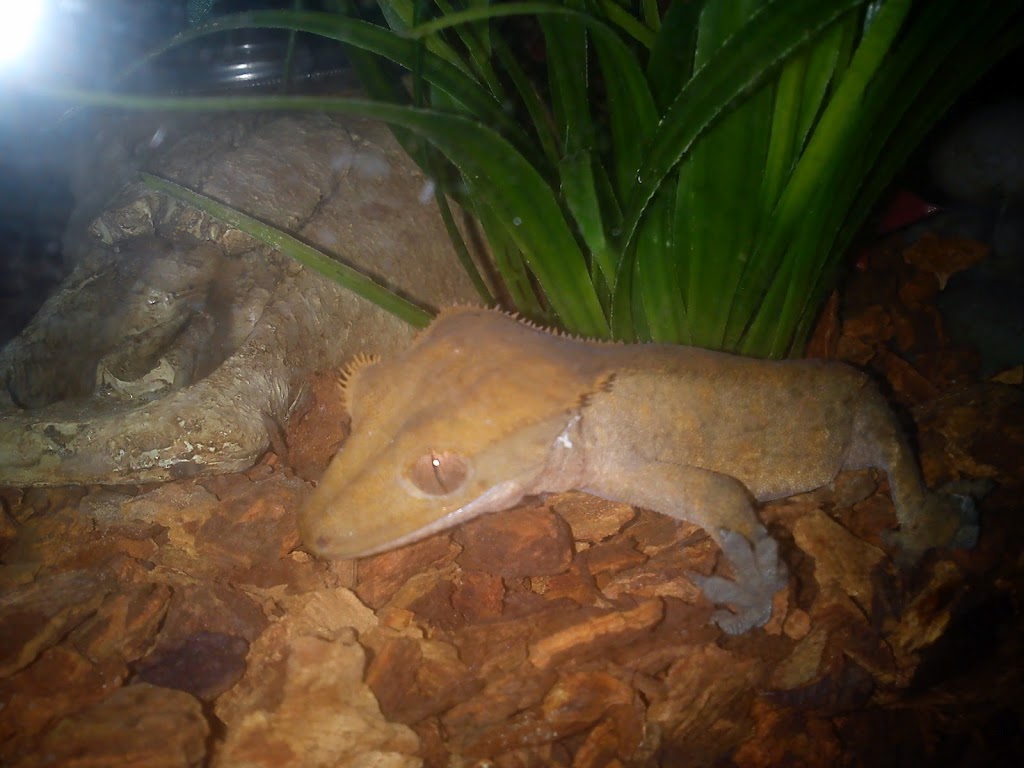
We were given a large fish tank and instantly went on a hunt to find something to put in it (fish being dismissed as “boring”). In the end we decided on a Crested Gecko because of the habitat requirements mainly. He has no tail (we are suckers for disadvantaged) and we call him Gary!


Anyhoo…
The tank has all sorts of holes and vents and flaps (fish don’t climb) so we needed a new lid. Luckily there is a ridge around the inside 7mm down from the lip. Once we had made a couple of card templates to allow for all the hinges and things that protrude in to the tank we cut a new lid out of 5mm clear acrylic. It had to be in two sections as the material wasn’t big enough but it turns out this makes it much easier for access.

Posted on

Laser Pin Table

Being attached to a print facility we cut a lot of paper and board and are always looking for ways to improve the cuts, reduce ashing etc. We have tried honeycomb, frames backings etc and decided to try a DIY pin table. 


The table consists of 4mm ply, laser cut, with a thin aluminium face and screws acting as the pins. We are really pleased with the results and the cuts we are getting are excellent. The next version will have vent holes added.  (FYI – the paper size here is SRA4 which is a printers oversize paper size of 320x225mm)


The height of the side panels is defined purely by what size screws we had to hand. If you build one yourself be careful as the screws are pretty dangerous when arranged like this.


These cards are for Jules Thomas at The Last Hurdle and have some really intricate work which cuts really well on this table.


The files can be downloaded from Thingiverse (thing 23940).

Posted on

Custom USB Cases

We have been asked to make a short run of custom USB Flash Drives so we needed a proof of concept. 

The red panels are slightly translucent so the LED on the board glows through the case.


We should be doing a variety of these so we will update when we have new ones.

Posted on

Boarduino ATTiny Programmer

We have been doing a lot of ATTiny programming recently and decided to simplify the process by making a board to plug everything in to rather than breadboarding it every time.


Rather than perf board we decided to make up a Laser masked PCB board  to take a boarduino, ATTiny and reset overide capacitor. More after the break:


A comprehensive overview of the setup can be found here http://hlt.media.mit.edu/?p=1695.


We did have a couple of problems getting everything to compile and had to manually install winavr, modify our ATTiny libraries and modify softwareserial. Most of this is due to using windows and upgrading from arduino versions 0023 to 1.0 half way through a project! oops.


The new setup is much more a plug and play solution rather than trying to set up a breadboard each time and we minimised the copper removed from the board which will save our etchant and looks nicer on the board!


Below is the board graphic as a bitmap for running through the laser. This is different to the board above in that it actually works, unlike version 1!

EDIT: I have discovered that Arduino 1.0 will not programme the ArduinoISP sketch correctly onto the boarduino. I have to load this using Arduino 0022 or 0023. I can then use 1.0 to programme the AtTiny – Chris.

Posted on

Laser Engraved PCB

I thought we were being really clever with this one but apparently it has been done before!

We needed a PCB making for a simple stepper motor driver and thought “why can’t we use the laser?”. A quick trip to maplins we had a copper clad board and some grey automotive primer.

The process itself is really simple:


1) Spray board with Primer


2) Engrave board with design


3) Etch Board


4) Remove remaining primer with acetone


5) Solder Board!


You will have to excuse the soldering – My drill bit was too large and i didn’t have any flux!


We are not going to be making proffesional boards like this but for a clean, high speed way to make a PCB its pretty good.