We normally throw a Halloween party in our house but this year we have managed to dodge the bullet friends of ours have volunteered to have a house full of over sugared children.
I couldn’t leave it at that however so I have created a Monster Box for my sons to take with them and scare the other guests.

The parts list is pretty basic:
Arduino Uno – http://www.hobbytronics.co.uk/arduino/arduino-uno-r3
Distance Sensor – http://www.hobbytronics.co.uk/GP2Y0A21-distance-sensor?keyword=distance
6 AA Battery Pack – http://www.maplin.co.uk/aa-size-battery-holders-31427
Mini 9g Servo – like these but there are loads on ebay. None that I can recommend having never used them http://www.ebay.co.uk/itm/5x-Tower-Pro-Micro-RC-SG90-9G-Servo-for-Car-Plane-Boat-Helicopter-Hobby-UK-/290787324013?pt=UK_ToysGames_RadioControlled_JN&hash=item43b446706d
Bits of wire, string, sticky tape, sticks, paint, glue etc.
The principle is pretty simple:
Distance sensor feeds back distance to Arduino
Arduino triggers servo when distance is less than n cm
Box stays shut for x time then opens again (as long as distance n is great enough)
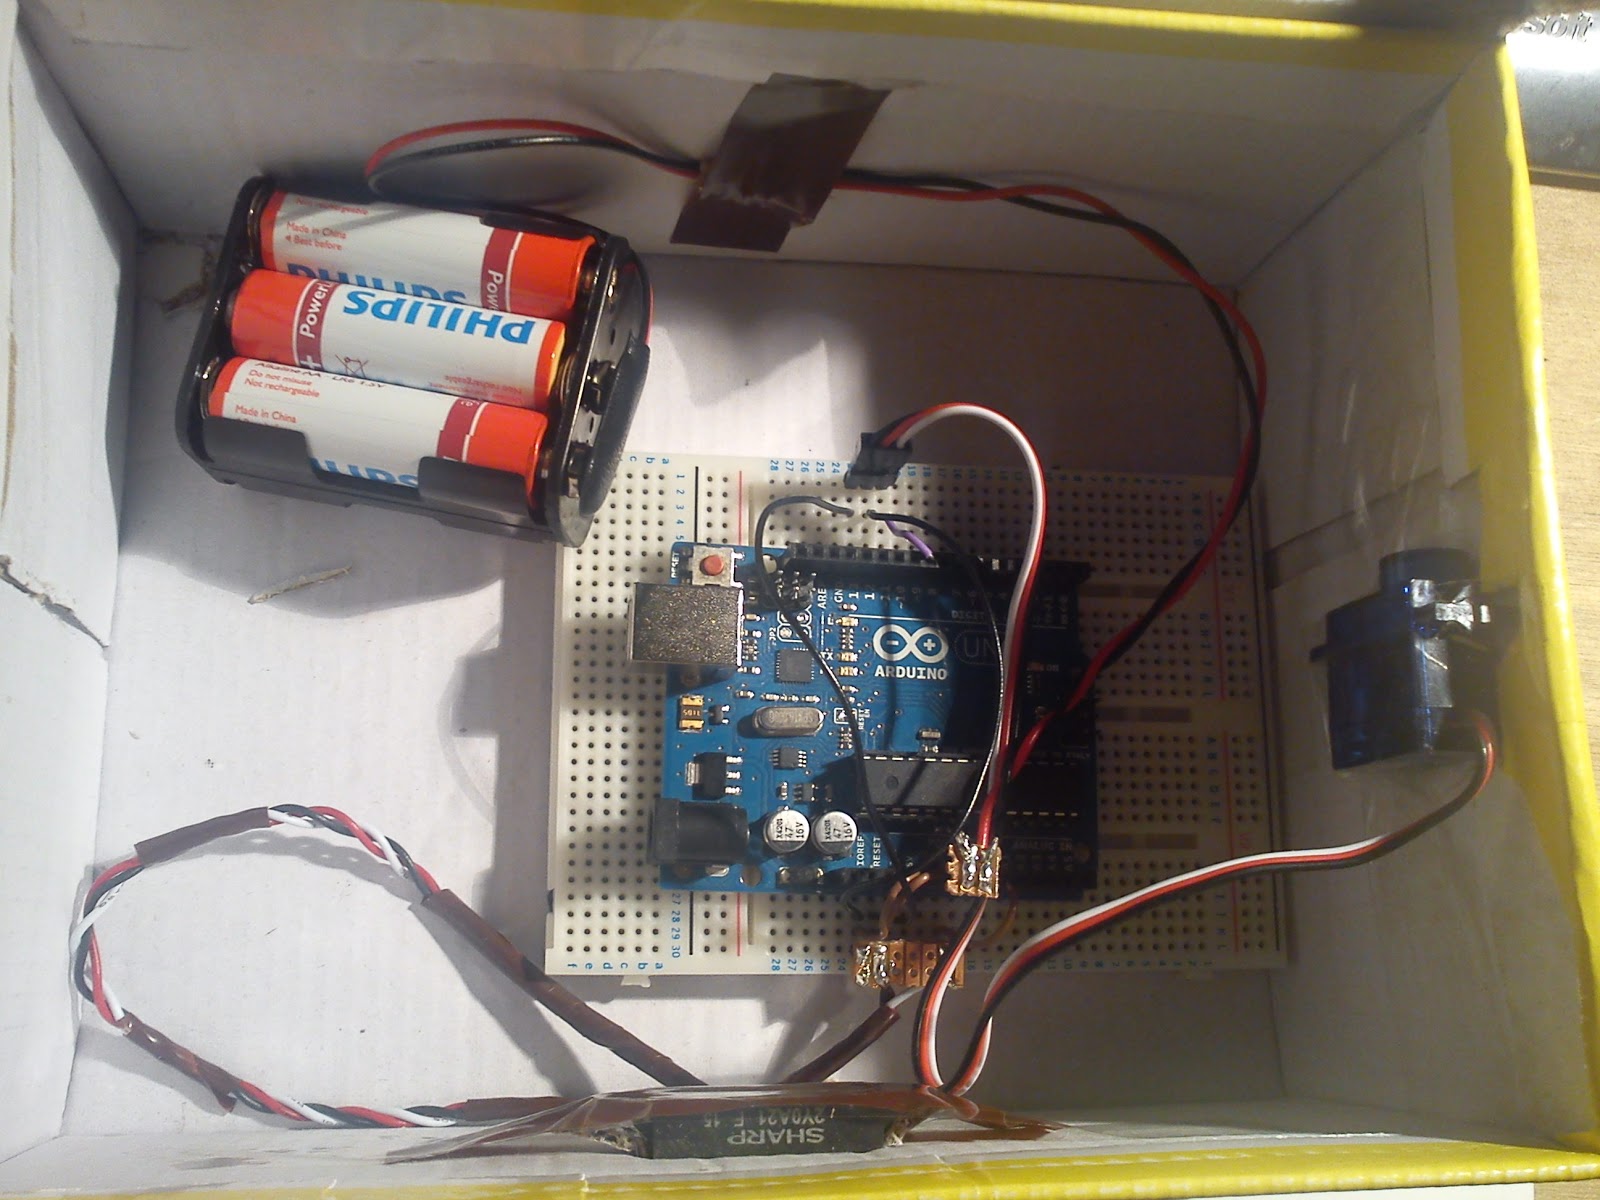
Servo signal wire is connected to pin 9, Distance sensor on pin A0, ground to ground, +ve to arduino 5v. Battery pack is to the arduino gnd and Vin rather than the barrel jack.
The sensor has a slot cut in the front of the box and is taped in place (Bottom of the Picture).

The servo has a stick (part of a very broken RC helicopter frame in this case) wired to the end of the arm, the stick is then stuck to the lid of the box.
The servo itself is stuck on to the side of the box with, surprise surprise, more sticky tape.
I have run out of switches so I soldered up a bit of protoboard with a couple of header pins and used a couple of jumpers as the switch.
The code is pretty simple and I am sure I will be told, at length, the number of ways that it could be done better!
****************************************************
int sensorPin = A0;
int distance = 0;
int servopin = 9;
int time = 0;
#include <Servo.h>
Servo myservo;
void setup()
{
myservo.attach(servopin);
Serial.begin(9600);
}
void loop(){
distance = 12343.85 * pow(analogRead(sensorPin),-1.15);
Serial.println(distance);
if (distance<75){
myservo.write(180);
delay(3000);
myservo.write(10);
time = random(1000, 5000);
delay(time);
}
else{
myservo.write(10);}
delay(100);
}
****************************************************
Pre decoration the box runs like this
Finally finished – not perfect by a long shot but it should entertain a group of 2-4 year olds for 10 minutes!
I apologise for the video – it wouldn’t focus on the black when it was closed! (this is the best of the bunch though!)